You’ll need a 1/4-inch (6mm) masonry drill bit with a carbide tip for installing your Ring doorbell on brick or concrete surfaces. For wood installations, use a smaller 3mm bit for direct screw mounting without anchors. Standard twist bits won’t work effectively on masonry materials and can dull quickly. Plastic expansion anchors require the full 1/4-inch hole size for secure mounting. Choosing the wrong bit size leads to loose fittings and compromised security, but proper techniques guarantee best results.
Quick Guide
- Use a 1/4 inch (6 mm) drill bit for pilot holes and wall anchors on most surfaces.
- Choose a 6 mm carbide-tipped masonry bit specifically for brick and concrete surfaces to prevent bit damage.
- For direct wood mounting without anchors, use a smaller 3 mm drill bit to prevent splitting.
- Ensure drill bit matches your wall anchor type – plastic expansion anchors require 1/4-inch holes for proper fit.
- Quality drill bits prevent oversized holes and project delays, especially on hard masonry surfaces.
Standard Drill Bit Sizes for Ring Doorbell Installation
When installing a Ring doorbell, you’ll typically need a 1/4 inch (6 mm) drill bit to create the proper pilot holes for your mounting screws.
This standard size works perfectly with the wall anchors included in most Ring installation kits.
For wood surfaces without anchors, you can use a smaller 3 mm bit to prevent splitting. Use a standard twist drill bit that’s suitable for your specific wall material, whether it’s wood or masonry.
Masonry and Brick Surface Requirements
When drilling into brick or masonry surfaces for your Ring doorbell, you’ll need a 6mm (approximately 1/4 inch) masonry drill bit with a carbide tip to penetrate these hard materials effectively.
Standard wood or metal bits won’t work on brick and will quickly dull or break when attempting to drill through masonry surfaces.
Carbide-tipped masonry bits are specifically engineered to handle the tough, abrasive nature of brick and mortar while creating clean, precise holes for your mounting anchors. When drilling into mortar joints, ensure you check the mortar thickness first to confirm it can provide adequate support for the screws and anchors.
6mm Masonry Bit Standard
Because masonry surfaces like brick and concrete require specialized drilling approaches, you’ll need to select the appropriate millimeter-sized masonry bit that matches your Ring doorbell’s mounting requirements.
Standard masonry bits range from 4.0mm to 7.0mm for typical household installations. These sizes correspond directly to wall plug diameters, ensuring proper anchor fit and secure mounting strength for your doorbell.
Carbide-Tipped Bits Recommended
Masonry installations demand carbide-tipped drill bits for ideal performance and longevity.
Tungsten carbide provides exceptional hardness and wear resistance against dense brick surfaces.
You’ll need SDS or SDS Plus bits for hammer drill compatibility, ensuring proper percussion action.
Carbide tips withstand high heat and friction while maintaining sharp edges longer than standard steel bits, providing cleaner holes.
Wood Surface Drilling Considerations
When installing your Ring doorbell on wood surfaces, you’ll need to choose between different drill bit sizes depending on your mounting approach.
For direct screw mounting into wood, a 3mm drill bit creates the ideal pilot hole that prevents splitting while ensuring secure attachment.
However, if you’re planning to use wall anchors for extra holding power, you’ll need a 6mm drill bit to accommodate the anchor plugs.
Optimal Bit Sizes
Most Ring doorbell installations on wood surfaces require a 3mm drill bit for direct mounting without wall anchors.
This size matches the screw’s minor diameter, preventing wood splitting while ensuring tight grip.
For installations requiring wall anchors, you’ll need a 1/4 inch (6mm) bit.
Always use sharp bits to minimize splintering and maintain clean pilot holes.
Anchor Vs Direct Mount
Although wood surfaces offer excellent screw retention on their own, choosing between anchor-assisted mounting and direct screw installation depends on your specific wood type and doorbell placement requirements.
You’ll find direct mounting simpler since wood holds screws firmly without additional hardware. Pre-drill small pilot holes to prevent splitting, but skip anchors—they’re unnecessary and complicate installation on wood surfaces.
Wall Anchor Compatibility and Hole Sizing
Selecting the correct wall anchor and corresponding drill bit size guarantees your Ring doorbell remains securely mounted regardless of your home’s exterior surface material.
You’ll need plastic expansion anchors with a 1/4-inch drill bit for masonry surfaces like stucco, brick, or concrete.
These weather-resistant anchors fit snugly into properly-sized pilot holes, preventing loose fittings and maintaining stable hold over time.
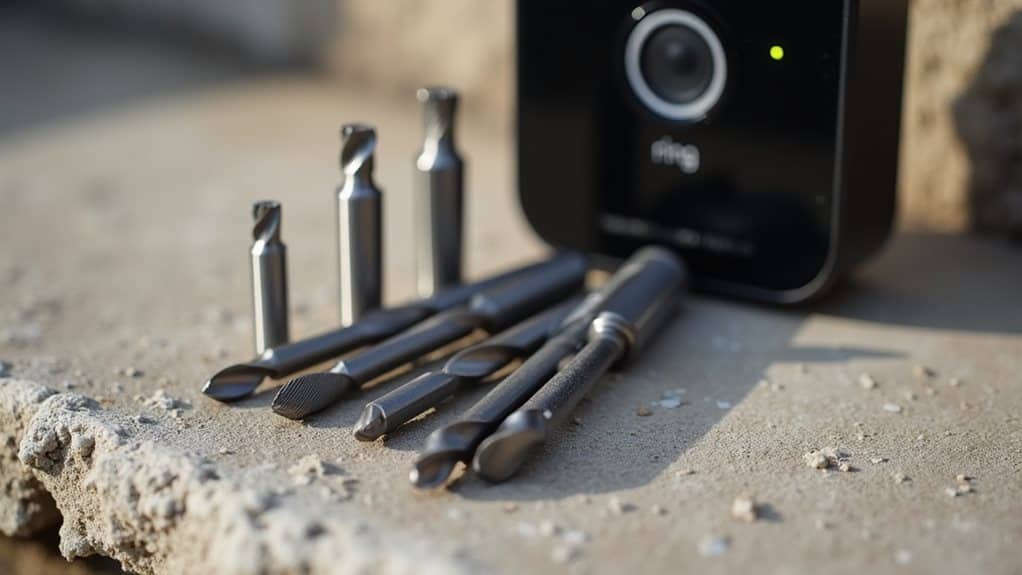
Essential Tools and Accessories for Proper Installation
Before you begin mounting your Ring doorbell, gathering the right tools and accessories guarantees a smooth, professional installation that’ll last for years.
You’ll need Phillips and security screwdrivers, a power drill with appropriate bits, mounting brackets, wall anchors, and leveling tools.
For hardwired models, include wire nuts. Pre-charge battery units and consider weatherproofing materials for ideal protection.
Drill Bit Quality and Performance Issues
When you’re drilling into brick, concrete, or other masonry surfaces for your Ring doorbell installation, you’ll quickly realize that not all drill bits perform equally.
Cheap or low-quality bits often dull rapidly against these hard materials, forcing you to stop mid-installation for replacements and greatly extending your project time.
Poor bit durability becomes especially problematic when drilling the precise 1/4-inch holes required for proper anchor placement, as worn bits can create uneven or oversized holes that compromise your doorbell’s stability.
Poor Bit Durability
Although Ring Doorbell kits include drill bits for installation, these supplied bits frequently lack the durability needed for effective drilling into brick or masonry surfaces.
You’ll find they’re made from softer metals that dull quickly when encountering abrasive materials like mortar. This inadequate hardness leads to premature wear, breakage, and inefficient drilling that requires excessive force during installation.
Hard Masonry Challenges
While standard drill bits may work adequately for softer materials, hard masonry surfaces present significant challenges that can quickly overwhelm inferior drilling equipment.
You’ll encounter rapid bit dulling, excessive heat buildup, and increased drilling effort with low-quality bits.
Poor-grade carbide tips won’t maintain sharpness, causing bit wandering and irregular holes that compromise your Ring Doorbell’s anchor effectiveness.
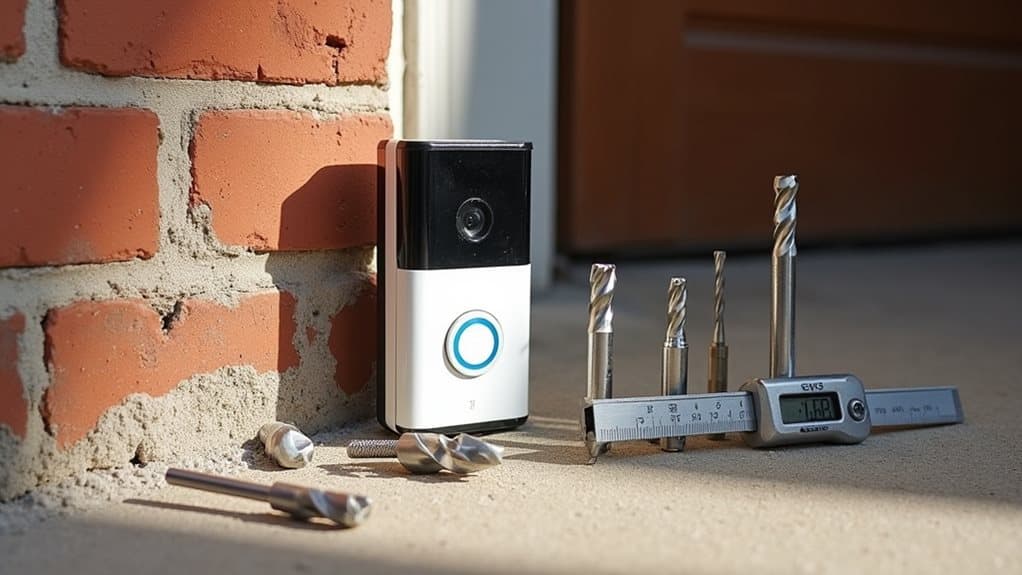
Official Ring Manufacturer Recommendations

Ring’s official installation documentation consistently specifies a 1/4″ (6mm) masonry drill bit as the standard size for mounting their doorbells across various surface types.
You’ll need to purchase this drill bit separately since Ring no longer includes them in packaging.
Their support materials emphasize using provided wall anchors with the correct bit size to guarantee secure mounting and maintain warranty coverage.
Surface-Specific Drilling Techniques
Once you’ve identified the correct drill bit size, the drilling technique varies considerably depending on your mounting surface.
Wood requires pre-drilling pilot holes to prevent splitting.
Masonry and brick need specialized bits, preferably drilling into mortar rather than brick.
Concrete demands hammer drills with steady pressure.
Always mark positions precisely and clear debris before drilling.
Common Installation Mistakes to Avoid
Even with the correct drill bit size and proper technique, installation errors can quickly turn a straightforward Ring doorbell setup into a frustrating troubleshooting session.
You’ll avoid most problems by ensuring your mounting bracket sits flush against the wall, confirming secure wire connections, and testing device functionality before final assembly.
Don’t skip pre-drilling holes or overtighten screws.
Best Practices for Secure Mounting
Proper mounting techniques will determine whether your Ring doorbell remains securely attached and functions reliably for years to come.
You’ll need to mark holes precisely using a level before drilling pilot holes.
Insert anchors completely into masonry surfaces, then secure the mounting bracket with at least four screws.
Don’t overtighten to prevent damage.
Wrapping Up
You’ll achieve a secure Ring doorbell installation by selecting the correct drill bit size for your specific surface material. Remember that masonry requires different bits than wood, and you must match hole diameter to your chosen anchors. Follow manufacturer specifications, use proper drilling techniques, and avoid common mistakes like oversized holes. With the right tools and careful preparation, you’ll create a stable mount that’ll keep your doorbell securely positioned for years.