When your Roku’s audio doesn’t match the video, you’re experiencing signal processing delays between your streaming device and audio equipment. Start by power cycling your Roku—unplug it for 2-3 minutes, then reconnect. Press the * button during playback to check volume modes and disable any interfering audio features. Confirm HDMI cables are firmly connected and try different ports if needed. For persistent issues, investigate advanced system settings and network optimization techniques below.
Quick Guide
- Power cycle your Roku by unplugging it for 2-3 minutes, then plugging it back in to reset processing delays.
- Press the * button during playbook to check Volume Mode settings and disable interfering audio features.
- Access Settings > System > Advanced system settings to disable automatic refresh rate adjustments causing sync issues.
- Check HDMI cable connections and try different ports, ensuring HDMI ARC is properly configured for soundbars.
- Switch to your router’s 5 GHz band or use wired Ethernet connection for improved streaming stability.
Common Causes of Audio and Video Sync Problems

When your Roku’s audio doesn’t match what’s happening on screen, several underlying factors could be causing this frustrating sync issue.
Signal processing delays occur when your TV and audio devices handle data at different speeds.
Transmission delays arise from wireless connections or cable differences.
Additionally, outdated software, corrupted files, or hardware compatibility problems can create timing mismatches. Wireless speakers may introduce inherent delays that compound these synchronization issues.
Quick Troubleshooting Steps to Try First
When you’re dealing with audio sync issues on your Roku device, you’ll want to start with the simplest solutions that often resolve the problem quickly.
First, power cycle your Roku by unplugging it from the power outlet, waiting 2-3 minutes, then plugging it back in to refresh system processes and clear temporary glitches.
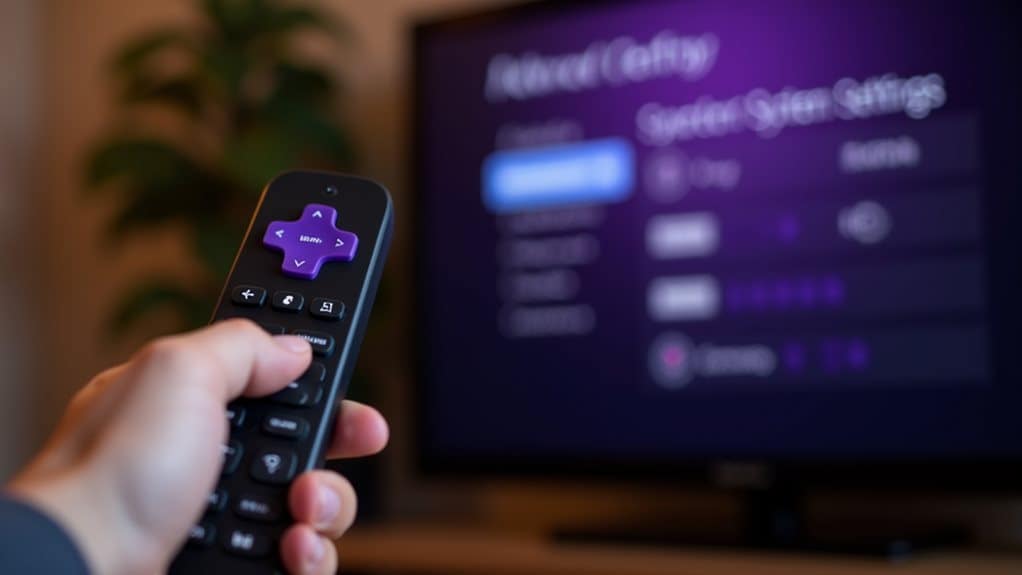
Next, check if Volume Mode is causing the delay by pressing the * button on your remote during playback and toggling off any enabled volume features that might interfere with audio timing.
Power Cycle Your Roku
The most effective first step for resolving audio sync issues involves performing a complete power cycle of your Roku device or TV.
Unplug your device from the power outlet completely and wait at least 60 seconds. This allows internal components to fully reset. Make sure the power cable is firmly connected at both ends to avoid loose connections.
Plug it back in securely and power on using your remote or the physical power button.
Disable Volume Mode
Although power cycling resolves many Roku issues, disabling Volume Mode often provides a faster solution for audio sync problems.
Press the * button on your remote while content plays, then select “Volume Mode” from the menu.
Toggle it off to disable audio processing that creates delays.
Restart your Roku to fully apply this setting change.
Adjusting Advanced System Settings
When basic troubleshooting doesn’t resolve audio sync issues, you’ll need to access Roku’s advanced system settings for more thorough solutions.
Find your way to Settings > System > Advanced system settings to discover powerful options that can address persistent synchronization problems. These deeper configuration tools include disabling automatic refresh rate adjustments, resetting network connections, and performing a complete factory reset as a last resort. Additionally, consider resetting network settings on your Roku device, as this can often help improve connection stability and resolve related audio issues.
Access Advanced Settings Menu
Since Roku’s advanced system settings contain powerful audio correction tools, accessing this menu becomes essential for resolving persistent sync issues.
Direct to Settings from your Roku home screen, then select System.
Under System, locate and select Advanced system settings.
This hierarchical menu path provides access to factory reset options, expert image settings, and specialized audio configurations that’ll help fix synchronization problems.
Disable Auto Refresh Rate
Within the advanced system settings menu, you’ll find the auto refresh rate feature that often contributes to audio synchronization problems on Roku devices.
Proceed to “Auto adjust display refresh rate” and toggle it off. This setting forces your display’s refresh rate to match content frame rates, but can disrupt audio timing and cause sync issues.
Factory Reset Process
If audio sync issues persist despite adjusting other advanced system settings, performing a factory reset will restore your Roku device to its original configuration and eliminate any corrupted settings that might be causing synchronization problems.
Direct yourself to Settings > System > Advanced system settings > Factory reset.
Enter the displayed confirmation code to proceed with the complete reset.
Network Connection and Streaming Optimization

When your Roku’s audio falls out of sync with video, network-related issues often serve as the primary culprit behind this frustrating problem.
Switch to your router’s 5 GHz band to reduce interference. Use a wired Ethernet connection when possible for maximum stability.
Enable QoS settings to prioritize streaming traffic, and keep your router within close proximity to minimize signal loss. Additionally, utilizing a VPN for streaming can enhance your connection by providing a more stable and secure internet experience.
External Device and Hardware Port Solutions
Hardware connections between your Roku and external devices frequently create audio sync problems that network optimizations can’t resolve.
Check HDMI cables for loose connections and firmly reconnect them. Test different HDMI ports on your TV or Roku to isolate faulty hardware.
For soundbars, verify you’re using HDMI ARC properly and switch audio modes from auto to stereo if needed. Additionally, ensure your Roku software is up-to-date to avoid compatibility issues that may affect audio sync.
Software Updates and Firmware Fixes
Although hardware fixes address many audio sync issues, outdated software often creates the underlying problems that persist across different devices and connections.
Access Settings > System > System update > Check now to install available patches. Reboot your Roku after updating to properly integrate fixes.
Disable “Auto adjust display refresh rate” to prevent timing conflicts that cause audio delays. Additionally, ensuring that your Roku software is up to date can help resolve black screen issues that might also affect audio performance.
Manual Audio Delay Compensation Methods
Software updates resolve many audio sync problems, but some situations require manual adjustment of audio delay settings to achieve perfect synchronization.
You’ll find “Audio Offset” or “Audio Delay” options in your Roku’s Advanced audio settings menu under Settings > Audio.
Adjust timing in 10-20 millisecond increments until speech matches lip movements perfectly.
Wrapping Up
You’ve now got multiple methods to fix Roku audio sync issues. Start with the quick troubleshooting steps, then move to advanced settings if needed. Check your network connection and update your software regularly. Don’t forget to test external devices and cables. If problems persist, try manual audio delay adjustments. Most sync issues resolve quickly with these solutions, getting you back to seamless streaming entertainment.