Wake the display, press NEXT three times, then hold HOLD until the padlock disappears; this releases UP, DOWN, NEXT, and HOLD controls. If it stays released, try the LuxPro “Three‑Tap Next” method: tap FORWARD three times while awake, then tap HOLD once. Exit any Hold mode by pressing HOLD again and verify the “Hold” tag is gone. Finally, flip the heat/cool switch to OFF for a quick reset, set it back, and test the arrows. Continue for deeper troubleshooting steps.
TLDR
- Wake the display, then tap FORWARD three times followed by a HOLD tap to remove the padlock icon and unlock controls.
- Verify Hold mode isn’t active; press HOLD once to exit Hold and ensure the “Hold” tag disappears from the display.
- Perform a hardware reset by flipping the heat/cool switch to OFF, then back to the desired mode, and test temperature adjustments.
- Replace low batteries, power‑cycle the unit, and confirm the fan switch is set to Auto and the mode selector is not OFF before retesting.
- Ensure the thermostat is in cooling mode with a sufficient temperature gap; if it still won’t change, contact an HVAC technician for power‑supply diagnostics.
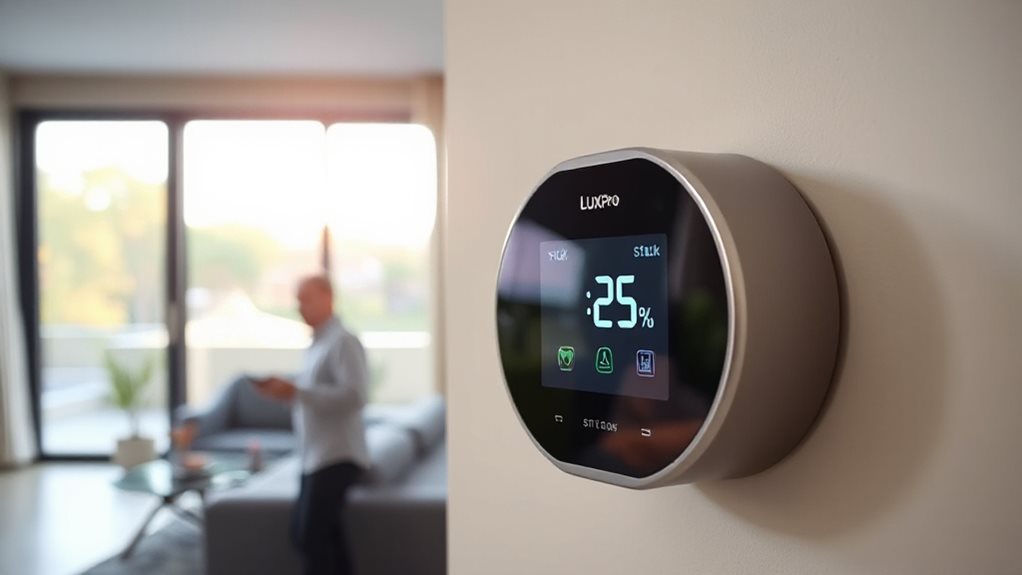
Quick Fix: Unlock the Padlock Icon
The padlock icon appears on the screen whenever the thermostat’s lock mode is active, preventing any temperature changes. First, press any button to wake the display. Then hit NEXT three times, followed by HOLD. The icon disappears, freeing the UP, DOWN, NEXT, and HOLD controls. If the lock remains, check for a stuck button or recent changes in lock settings that may require a factory or professional reset. Regularly verify that a persistent lock state isn’t caused by a misidentified system type or nearby interference that prevents unocking system compatibility.
Three‑Tap “Next” Unlock Sequence for LuxPro
When the padlock icon shows up on your LuxPro thermostat, you can open the keypad with a simple three‑tap “Next” sequence.
Tap FORWARD three times, then HOLD once while the screen is awake.
The icon disappears, releasing UP, DOWN, NEXT, HOLD, rotary dial, and software reset.
Wake the screen first if idle; this works across most LuxPro models.
Additionally, ensure you’re connected to a stable network to maintain a consistent connection during the reset process, and consider checking for a firmware update if the icon reappears after you reset. DDoS protection
Enter and Exit Hold Mode for Fixed Temperature
Press the Hold button once to activate Hold Mode; the display will flash “Hold” and you can adjust the temperature with the up or down arrows.
When you’re ready to return to the programmed schedule, press Hold again and the indicator disappears, restoring the weekday/weekend program automatically.
Verify that the temperature stays fixed by checking the display; if it shows the set point and the “Hold” tag, the override is active.
Additionally, ensure your thermostat stays connected to its control app or hub by confirming it remains paired with the intended device for reliable temperature control. Hold mode
Activate Hold Mode
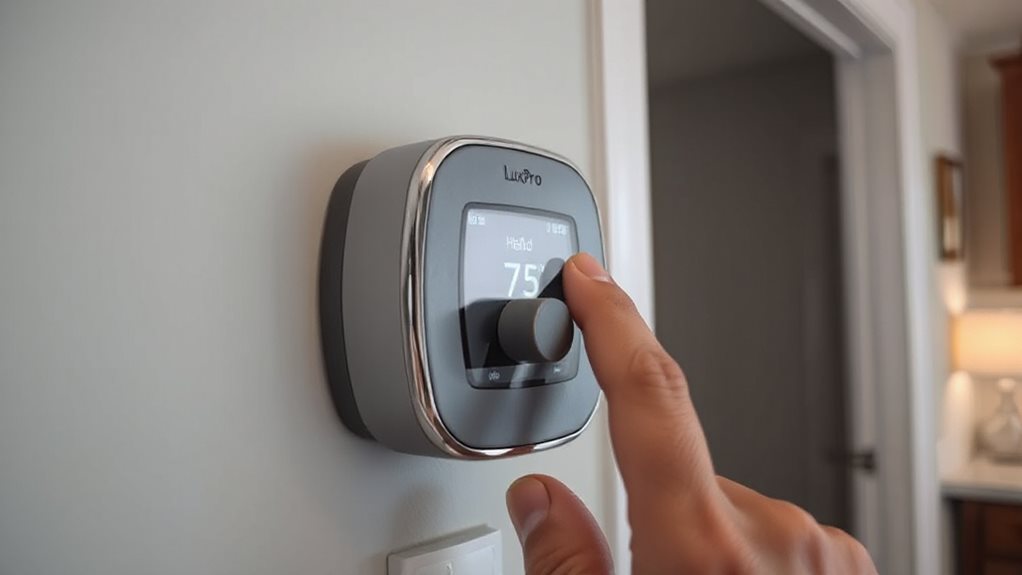
If you need a steady temperature without the programmed schedule interfering, activate Hold mode on your LuxPro thermostat.
Press the front‑panel Hold button once; the display shows “Hold.”
Set Heat or Cool, then use the up/down arrows to pick your desired temperature—75°F for heating, 72°F for cooling, for example.
The thermostat keeps that setting indefinitely, bypassing all programmed periods.
Exit Hold Mode
Usually, exiting Hold mode on a LuxPro thermostat is as simple as a single press of the HOLD button. You’ll see the “HOLD” indicator vanish, and the display returns to the current program period.
The thermostat instantly resumes its weekday/weekend schedule, regardless of HEAT, COOL, or OFF positions. No temperature adjustment is needed—just press once, and you regain full control.
Verify Temperature Override
After you’ve exited Hold mode, the next step is to confirm that the thermostat can lock in a fixed temperature when you re‑enter Hold.
Switch to Heat or Cool, set the desired temperature with the arrows, then press Hold.
Verify the “Hold” label appears and the display shows the setpoint.
Finally, exit Hold again to make sure the override persists.
How to Reset by Flipping Heat/Cool Switches
When you flip the heat/cool switch to the “off” position, the thermostat initiates a hardware reset that refreshes its internal logic without erasing your programmed temperature settings. This reset can also help reestablish a stable power supply and clear minor glitches that may affect temperature changes. Stable power supply and the clock restart help ensure your new set point is applied correctly. Then set the switch to heat or cool, press the up/down buttons to choose a new set point, and hit Set. The display confirms the change, and the clock restarts, clearing minor glitches.
Reset to Factory Settings in a Few Simple Steps
You’ll start by selecting the Reset mode on the thermostat’s menu, then press and hold the two designated buttons at the same time. Keep them pressed until the display flashes, indicating the factory settings are being applied.
After releasing, the unit will reboot and you can verify that the default configuration is active.
Reset Mode Selector
If you need to restore your LuxPro thermostat to its original settings, start by moving the mode selector switch to the “Off” position. This prepares the unit for the reset sequence on TX100E, P711, P711V, and P721 models.
After confirming the switch is off, press the reset button behind the front panel or remove the back cover, depending on your model, to initiate the factory reset.
Reset, set the day and time immediately.
Hold Buttons Simultaneously
After turning the mode selector to “Off,” you’ll need to press and hold the Set and Next buttons together to trigger a factory reset.
Keep them pressed for ten to fifteen seconds while the screen flashes.
When the full display appears, the reset is complete.
Then set the day, time, and temperature defaults before using the thermostat again.
LuxPro Thermostat Battery Replacement & Power‑Cycle Tips
When the LOW BAT light flashes, a quick battery swap and power‑cycle usually restores full functionality.
– If the issue persists after replacing the batteries, verify the power supply is stable and that the wall outlet is not intermittent electrical supply and consider testing with a known-good outlet.
Model‑Specific LuxPro Variants (PSP511LCa, TX100E, P711)
The low‑battery indicator is just one sign that the thermostat may need attention, but each LuxPro model also has its own setup quirks.
PSP511LCa lets you set day, time, and 5‑2 scheduling via the dial and up/down buttons; TX100E uses a similar speed dial for single‑stage systems; P711 offers a keypad lockout and EL display.
Adjust settings, confirm with “Run,” and you’ll regain control. A green blinking light on related Nest models can indicate a software update in progress, but ensure power stability and correct wiring to avoid update loops. Power stability helps prevent repeated restarts and keeps the LuxPro units operating smoothly.
Check Switch Positions Before/After Reset
Before you hit reset, make sure the fan switch is set to AUTO and the temperature mode is on HEAT or COOL, not OFF.
After you press the reset button, verify those switches stayed in the same positions and that the jumper settings haven’t shifted.
If any switch moved, readjust it before you continue troubleshooting.
Resetting AirPods and Device Connections can help restore proper audio routing when switching devices. AirPods
Switch Positions Pre‑Reset
If you skip the pre‑reset switch check, the thermostat won’t respond to temperature changes.
First, open the door and locate the mode switch. Set it to OFF before any hardware reset; this makes sure the unit is ready.
Verify the fan switch is on AUTO, not ON, to avoid unnecessary power draw.
Confirm batteries are installed and wiring is secure.
These steps make sure the thermostat can accept new temperature commands.
Most models include a backlit display for low‑light operation.
Switch Positions Post‑Reset
Skipping the pre‑reset switch check means the thermostat may ignore temperature commands, but even after you’ve verified those settings, you still need to confirm the switch positions once the hardware reset finishes.
After “SYS” appears, set the fan switch to Auto, not On, to avoid constant running.
Push the system switch up for heat or down for cool, and verify jumper changes took effect.
Check the LCD for Hold status, then proceed.
Test Temperature Changes After Each Troubleshooting Step
After each troubleshooting step, you should verify that the thermostat now responds to temperature adjustments.
Press the up or down arrows and watch the display change.
If the padlock disappears, the lock’s released.
After a hardware reset, test the arrows again.
Following a software reset, set a new temperature and confirm it updates.
After battery replacement, repeat the adjustment check.
Finally, exit Hold mode and retest responsiveness.
Also, ensure the thermostat is in cooling mode and that there is a sufficient gap between the current and target temperatures to trigger AC. Power supply verification is essential if the unit does not respond after resets.
Call a Pro When Hardware Failure Is Evident
After confirming that none of the troubleshooting steps restore responsiveness, it’s time to call a professional. If you’re unsure about power or wiring issues, a qualified HVAC technician can safely assess the system transformer and 24 Vac supply to ensure proper operation 24 Vac power and determine if a component needs replacement.
Preventive Maintenance to Keep Your LuxPro Running Smoothly
Keeping your LuxPro thermostat in top shape starts with a regular preventive‑maintenance routine.
Replace batteries every six months, or sooner if the LOW BAT icon appears or the display blacks out.
Dust the unit monthly with a soft cloth, avoiding liquids.
Test accuracy with a reliable thermometer; recalibrate if the gap exceeds 3°F.
Release or reset by following the manual, and keep the thermostat away from drafts, vents, or direct sunlight. Be aware that blinking green indicators on similar devices can signal startup, updates, or power issues, so verify power wiring and connections if you notice unusual behavior 24VAC power.
And Finally
Follow the steps in order, testing the temperature after each one. If freeing the padlock, exiting hold mode, or resetting the thermostat restores control, you’ve resolved the issue. Should the problem persist despite correct switch positions and a factory reset, it likely indicates a hardware fault. Contact a qualified technician for repair or replacement, and schedule regular maintenance to keep your LuxPro operating reliably.